**There are many online AI tools to search documents via AI-powered chat. In our [Magic AI Newsletter](https://news.tinztwinshub.com/weekly-magic-ai-deepfloyd-if-geoffrey-hinton-inflection-ai-pi/), we introduced PDF.ai to you. Such Tools have disadvantages. You don't know how your data is being processed. Moreover, these tools often have fees.**
Generated with Grok
Today we introduce you to PrivateGPT. You can use PrivateGPT offline on your computer to search your documents. 100% private! We show you step-by-step how to install PrivateGPT. Let's get started.
## Sneak peek: PrivateGPT in action
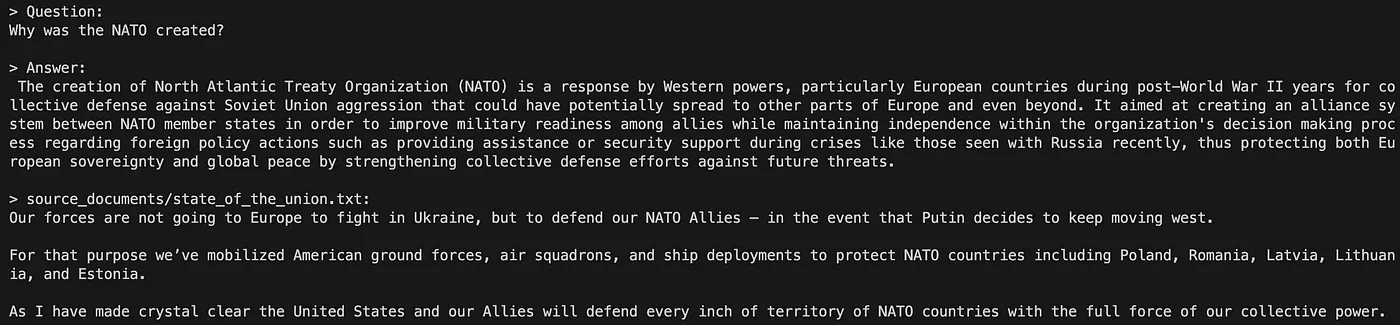
You can ask questions about your documents without an internet connection. The developers demonstrate this with the example file. We ask a question and privateGPT answers. As follows:
PrivateGPT example (Screenshot by authors)
PrivateGPT answers the question "Why was the Nato created?" very precisely. What do you think?
Let's jump into the guide.
## Installation: Step-by-Step Guide
The installation is simple if you have some experience with terminal commands. Let’s dive in.
### Step 1: Download PrivateGPT from GitHub
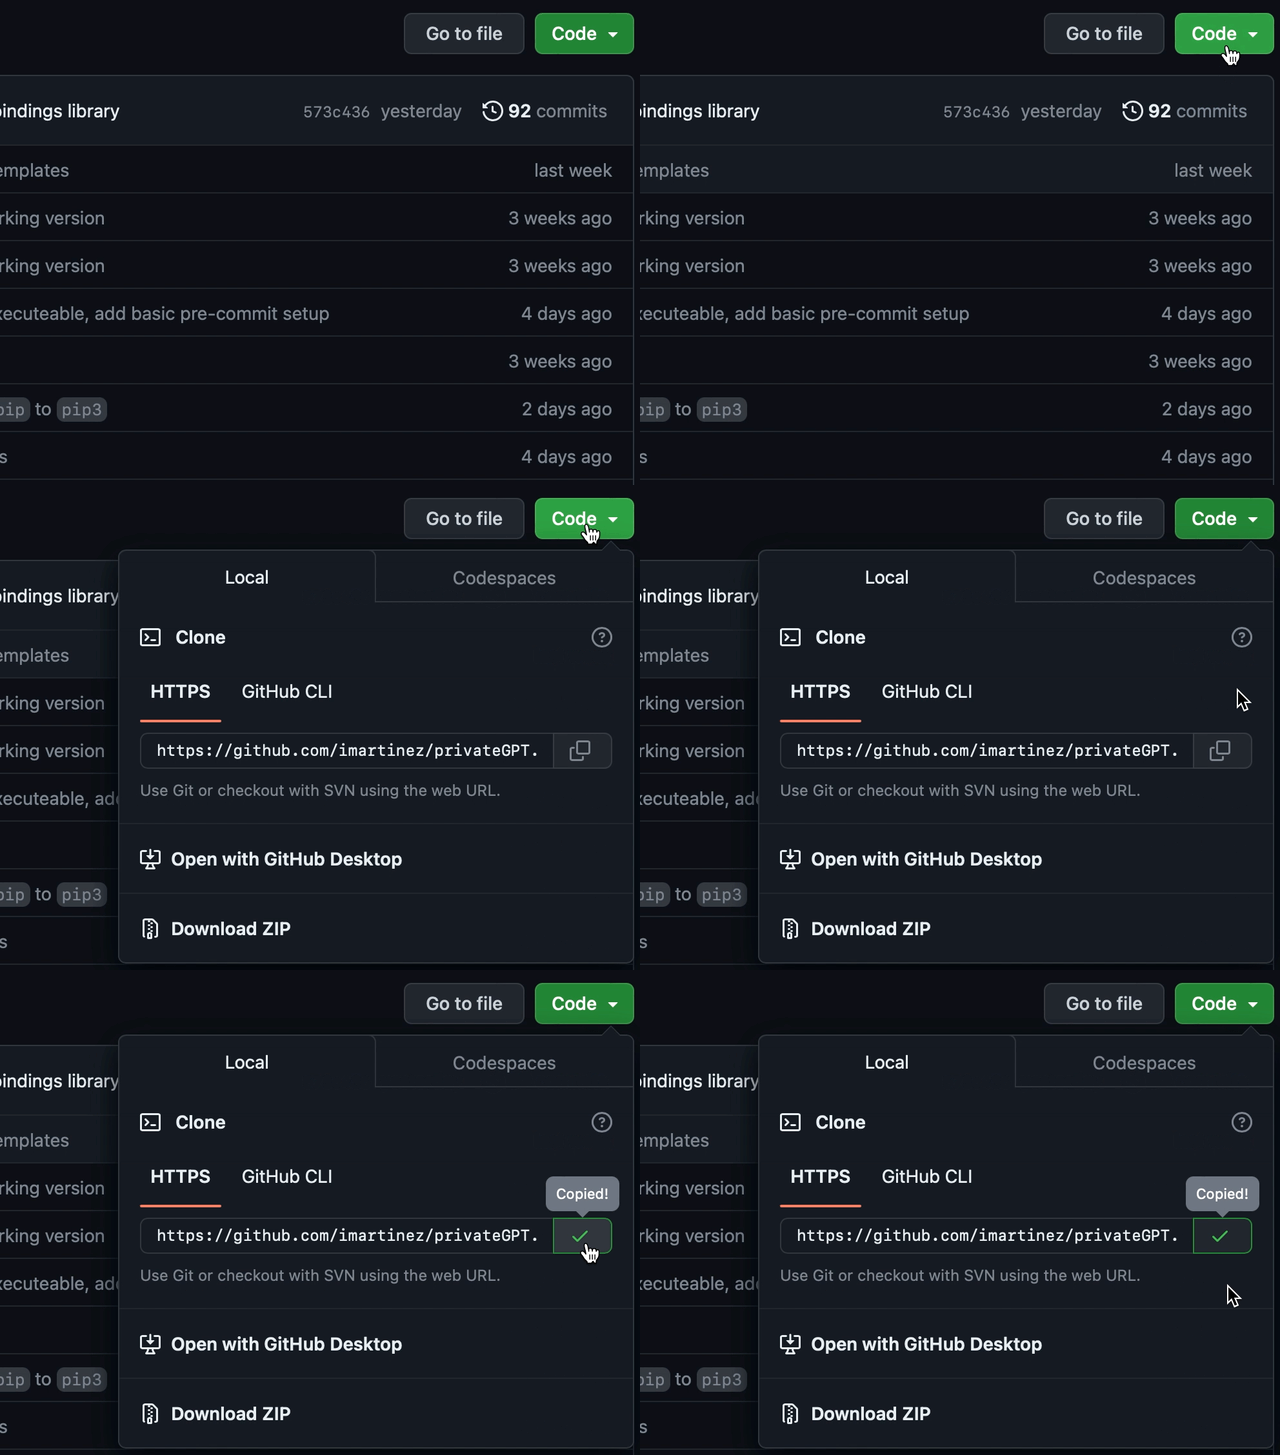
Go to the [GitHub repo](https://github.com/zylon-ai/private-gpt){:target="_blank" rel="noopener"} and click on the green button ‘Code’. Copy the link as shown below.
Copy Link (Gif by authors)
Open a terminal and clone the repo with the following Git command:
```bash
git clone https://github.com/imartinez/privateGPT.git
```
Decide for yourself in which folder you would like to save the repo.
### Step 2: Configure PrivateGPT
After the cloning process is complete, navigate to the privateGPT folder with the following command.
```bash
cd privateGPT
```
Then you will see the following files.
Files inside the privateGPT folder (Screenshot by authors)
In the next step, we install the dependencies. The requirements.txt file contains all the necessary dependencies. We recommend that you install the dependencies in a virtual environment. You can create a virtual environment with miniconda, for example. Download miniconda from the [website](https://docs.anaconda.com/miniconda/){:target="_blank" rel="noopener"}. Then you can create and activate the virtual environment as follows.
```bash
conda create -n privategpt python=3.10 # Enter y: Proceed ([y]/n)? y
conda activate privategpt
```
Now, you are ready to install the dependencies. Using pip to install the dependencies:
```bash
pip install -r requirements.txt
```
The installation takes a moment. Once the installation is finished, we still need to rename the ```example.env``` to ```.env```. You can do that with a simple terminal command.
```bash
mv example.env .env
```
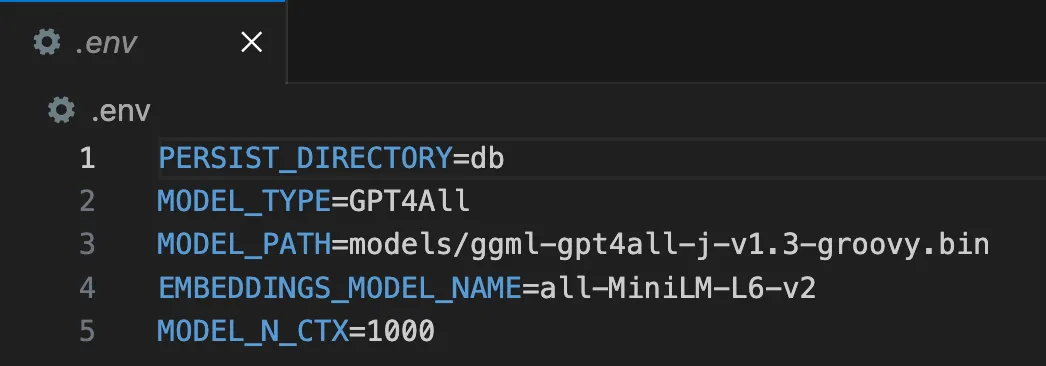
The ```.env``` file contains the following information:
.env file (Screenshot by authors)
You will find a description of the individual parameters below.
```plaintext
PERSIST_DIRECTORY: Vectorstore
MODEL_TYPE: Supports LlamaCpp or GPT4All
MODEL_PATH: Path to your GPT4All or LlamaCpp supported LLM
EMBEDDINGS_MODEL_NAME: SentenceTransformers embeddings model name (see https://www.sbert.net/docs/pretrained_models.html)
MODEL_N_CTX: Maximum token limit for the LLM model
```
We use the default parameters in this tutorial. Feel free to try other model types.
Now, we need to download the LLM. To do this, we go back to the [GitHub repo](https://github.com/zylon-ai/private-gpt){:target="_blank" rel="noopener"} and download the file ggml-gpt4all-j-v1.3-groovy.bin. The download takes a few minutes because the file has several gigabytes.
Then we create a ```models``` folder inside the ```privateGPT``` folder. In this folder, we put our downloaded LLM.
### Step 3: Ask questions about your documents
You place all the documents you want to examine in the directory ```source_documents```. PrivateGPT supports a wide range of document types (CSV, txt, pdf, word and others).
We use a PDF print of our Medium article “[Every Investor is talking about OpenBB 3.0: Here’s why?](https://medium.com/tinztwins/every-investor-is-talking-about-openbb-3-0-heres-why-3a479eadb3c6){:target="_blank" rel="noopener"}”.
Run the following command to ingest your data:
```bash
python ingest.py
```
> Note: during the ingest process no data leaves your local environment. You could ingest without an internet connection, except for the first time you run the ingest script, when the embeddings model is downloaded. — Source: Readme privateGPT
This process takes approx. 20 to 30 seconds. Now, we run the following command to ask questions:
```bash
python privateGPT.py
```
Wait for the script to require your input. We ask the following question:
```plaintext
Enter a query: Which programming language does OpenBB use?
> Question:
Which programming language does OpenBB use?
> Answer:
Python is the primary codebase in all three editions of OpenBB
```
Awesome! PrivateGPT answered the question correctly. Our tests have shown that privateGPT is not as fast as ChatGPT. But it works offline, and your documents are only processed locally.
PrivateGPT is not ready for production. The model is not optimized for performance but for privacy.
💡 Do you enjoy our content and want to read super-detailed guides about AI Engineering? If so, be sure to check out our premium offer!