**TimescaleDB is an open-source relational database for time-series data. It uses full SQL, but scales in a way that was previously reserved for NoSQL databases.**
Generated with Bing DALL-E
In this article, we will introduce the timescale database. We will also show you how to set up a timescale database easily with Docker. The steps are the following:
1. **TimescaleDB basics**
2. **Technical requirements**
3. **TimescaleDB with Docker**
4. **Example with Python**
5. **Conclusion**
## TimescaleDB basics
TimescaleDB uses PostgreSQL with the largest ecosystem of developer and management tools. Furthermore, TimescaleDB achieves 10–100 times faster queries than PostgreSQL, InfluxDB and MongoDB. You can write millions of data points per second and store hundreds of terabytes on a single node or petabytes on multiple nodes.
### What are time series data?
Time series data is data that summarises how a system, process or behavior changes over time. These data have the following characteristics:
* **Time-centric**: Data records always have a timestamp
* **Append-only**: Data is almost solely append-only
* **Recent**: New data usually is about recent time intervals
A key difference between time-series data, compared to other data like standard relational data, is that changes to the data are inserts, not overwrites.
You will find time series in different sectors, e.g. in the monitoring of computer systems, in financial trading systems, the Internet of Things and in the context of business intelligence.
### Main concepts of TimescaleDB
**Hypertables** are PostgreSQL tables with special features for handling time series data. You can use hypertables and regular PostgreSQL tables in the same database. Choose a hypertable for time series and a regular PostgreSQL table for relational data.
For better illustration, an example: To record share prices over time, use a hypertable and a regular table to record ticker symbols and names for each stock.
## Technical requirements
You will need the following prerequisites:
* The latest version of Docker must be installed on your machine. If you do not have it installed yet, please follow the [instructions](https://docs.docker.com/get-docker/){:target="_blank" rel="noopener"}.
* The latest version of Docker Compose must be installed on your machine. Please follow the [instructions](https://docs.docker.com/compose/install/){:target="_blank" rel="noopener"}.
* Access to a bash (macOS, Linux or Windows).
* A Python package manager of your choice like [conda](https://docs.conda.io/en/latest/miniconda.html){:target="_blank" rel="noopener"}
## TimescaleDB with Docker
First, you should check that you have Docker and Docker Compose installed correctly. Open the terminal of your choice and enter the following command:
```bash
$ docker --version
# Example output: $ Docker version 20.10.21
```
If the installation is correct, the Docker version is output. You can check the same for your Docker Compose installation.
```bash
$ docker-compose --version
# Example output: $ Docker Compose version v2.12.2
```
Yeah. Everything is ok. Now, we can start with our Docker Compose stack.
### Setup with Docker Compose
There are [several ways](https://docs.timescale.com/install/latest/){:target="_blank" rel="noopener"} to set up TimescaleDB. We will focus on the container-based option in this article. The stack contains two services, [TimescaleDB](https://hub.docker.com/r/timescale/timescaledb){:target="_blank" rel="noopener"} and [Adminer](https://hub.docker.com/_/adminer/){:target="_blank" rel="noopener"}. Adminer is a full-featured database management tool.
**Docker Compose Stack (docker-compose.yml file):**
```yaml
version: "3.8"
services:
timescaledb:
image: timescale/timescaledb:latest-pg14
container_name: timescale
hostname: timescaledb
restart: always
ports:
- ${TIMESCALEDB_PORT}:5432
volumes:
- ./${TIMESCALEDB_DATA_STORE}:/var/lib/postgresql/data
environment:
POSTGRES_PASSWORD: ${TIMESCALEDB_PASSWORD}
POSTGRES_USER: ${TIMESCALEDB_USER}
POSTGRES_DB: ${TIMESCALEDB_DB}
adminer:
image: adminer:4.8.1
container_name: adminer
restart: always
ports:
- ${ADMINER_PORT}:8080
```
It is recommended to separate the variables into an .env file. It leads to a better overview.
**.env file:**
```plaintext
# timescaledb
TIMESCALEDB_PORT=5432
TIMESCALEDB_DATA_STORE=timescaledb/
TIMESCALEDB_PASSWORD=timescaledb
TIMESCALEDB_USER=timescale
TIMESCALEDB_DB=timescale_database
# adminer
ADMINER_PORT=8087
```
Open the terminal of your choice. You can start the docker-compose stack with the following command:
```bash
$ docker compose up -d
```
The flag -d means that the container is running as a daemon. In this mode, the terminal does not output any logs. You can see the logs for a specific container with the following command:
```bash
$ docker compose logs --follow
```
The logs show the state of the container. If everything is ok, then you can use the TimescaleDB with Adminer.
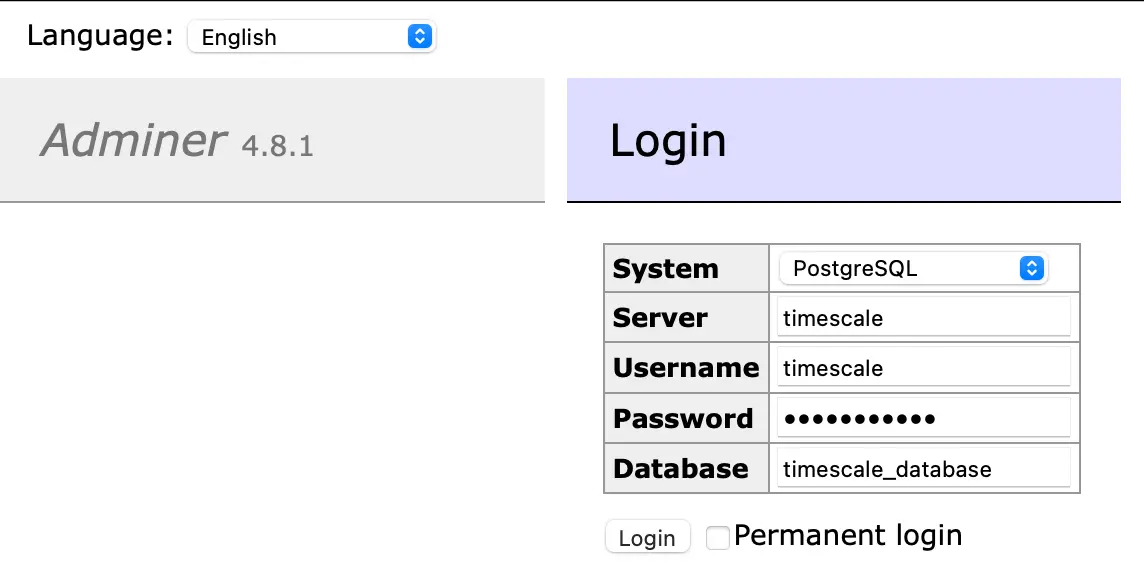
You can log in via the Adminer UI at localhost:8087. You can find the login data in the .env file (see above).
## Example with Python
The following explanations are based on the [Quick Start Python examples](https://docs.timescale.com/timescaledb/latest/quick-start/python/){:target="_blank" rel="noopener"} from TimescaleDB.
### Connect to database
The following Python code establishes the connection to the database.
```python
import psycopg2
# Structure of the connection string:
# "postgres://username:password@host:port/dbname"
CONNECTION = "postgres://timescale:timescaledb@localhost:5432/timescale_database"
conn = psycopg2.connect(CONNECTION)
```
### Create tables
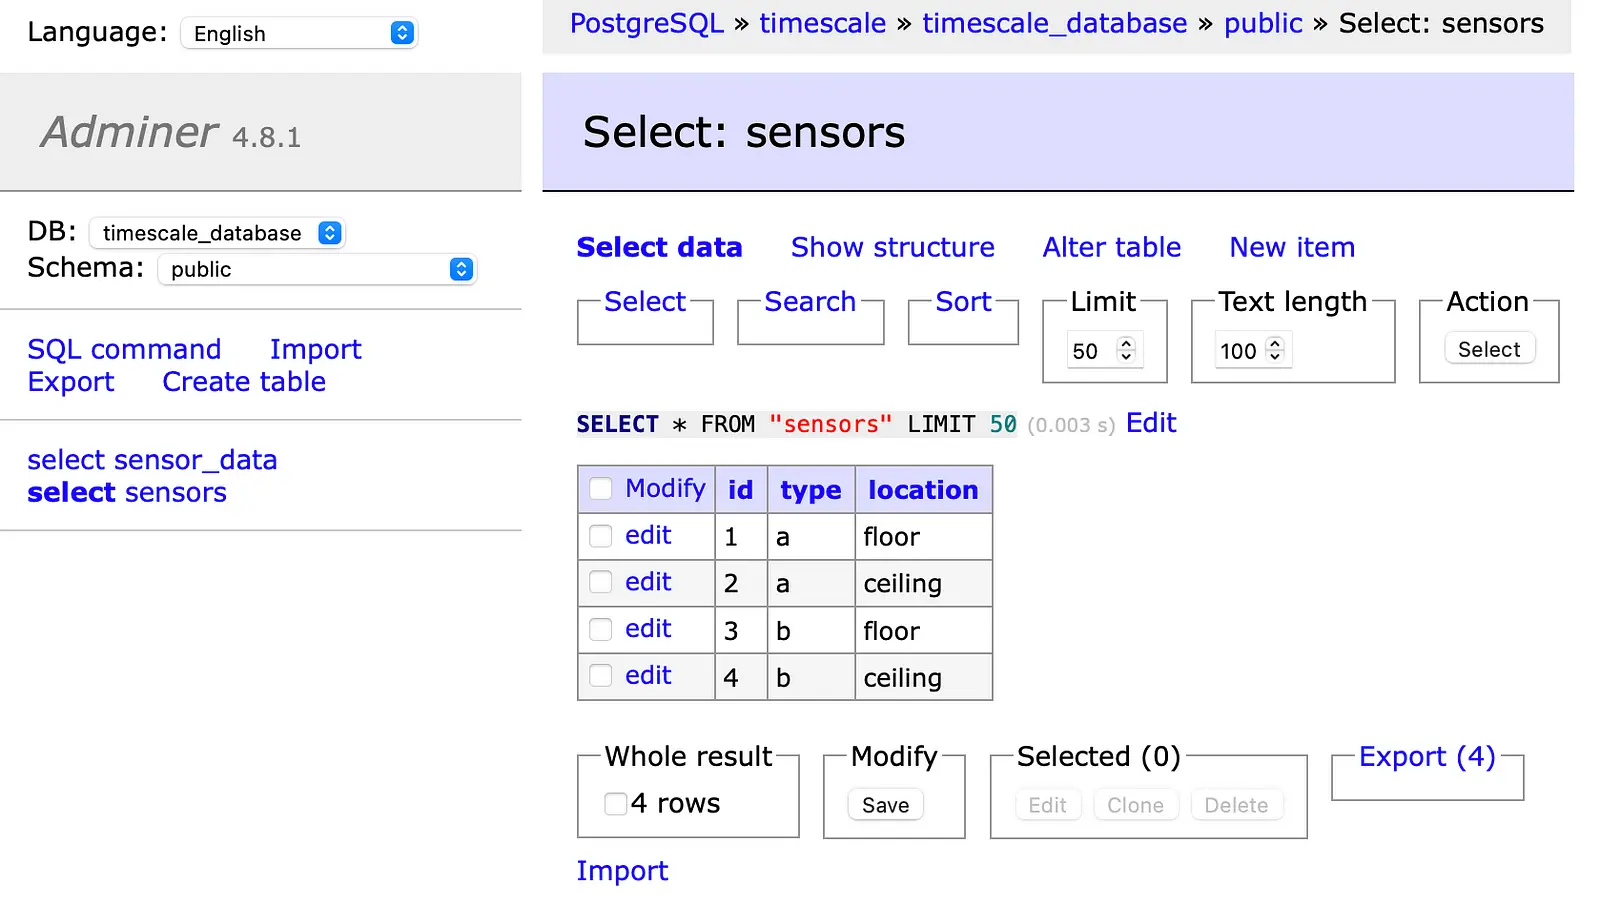
Now, we create a relational table with the name **sensors** and the columns *id*, *type* and *location*.
```python
# create relational table
query_create_sensors_table = "CREATE TABLE sensors (id SERIAL PRIMARY KEY, type VARCHAR(50), location VARCHAR(50));"
cursor = conn.cursor()
cursor.execute(query_create_sensors_table)
conn.commit()
cursor.close()
```
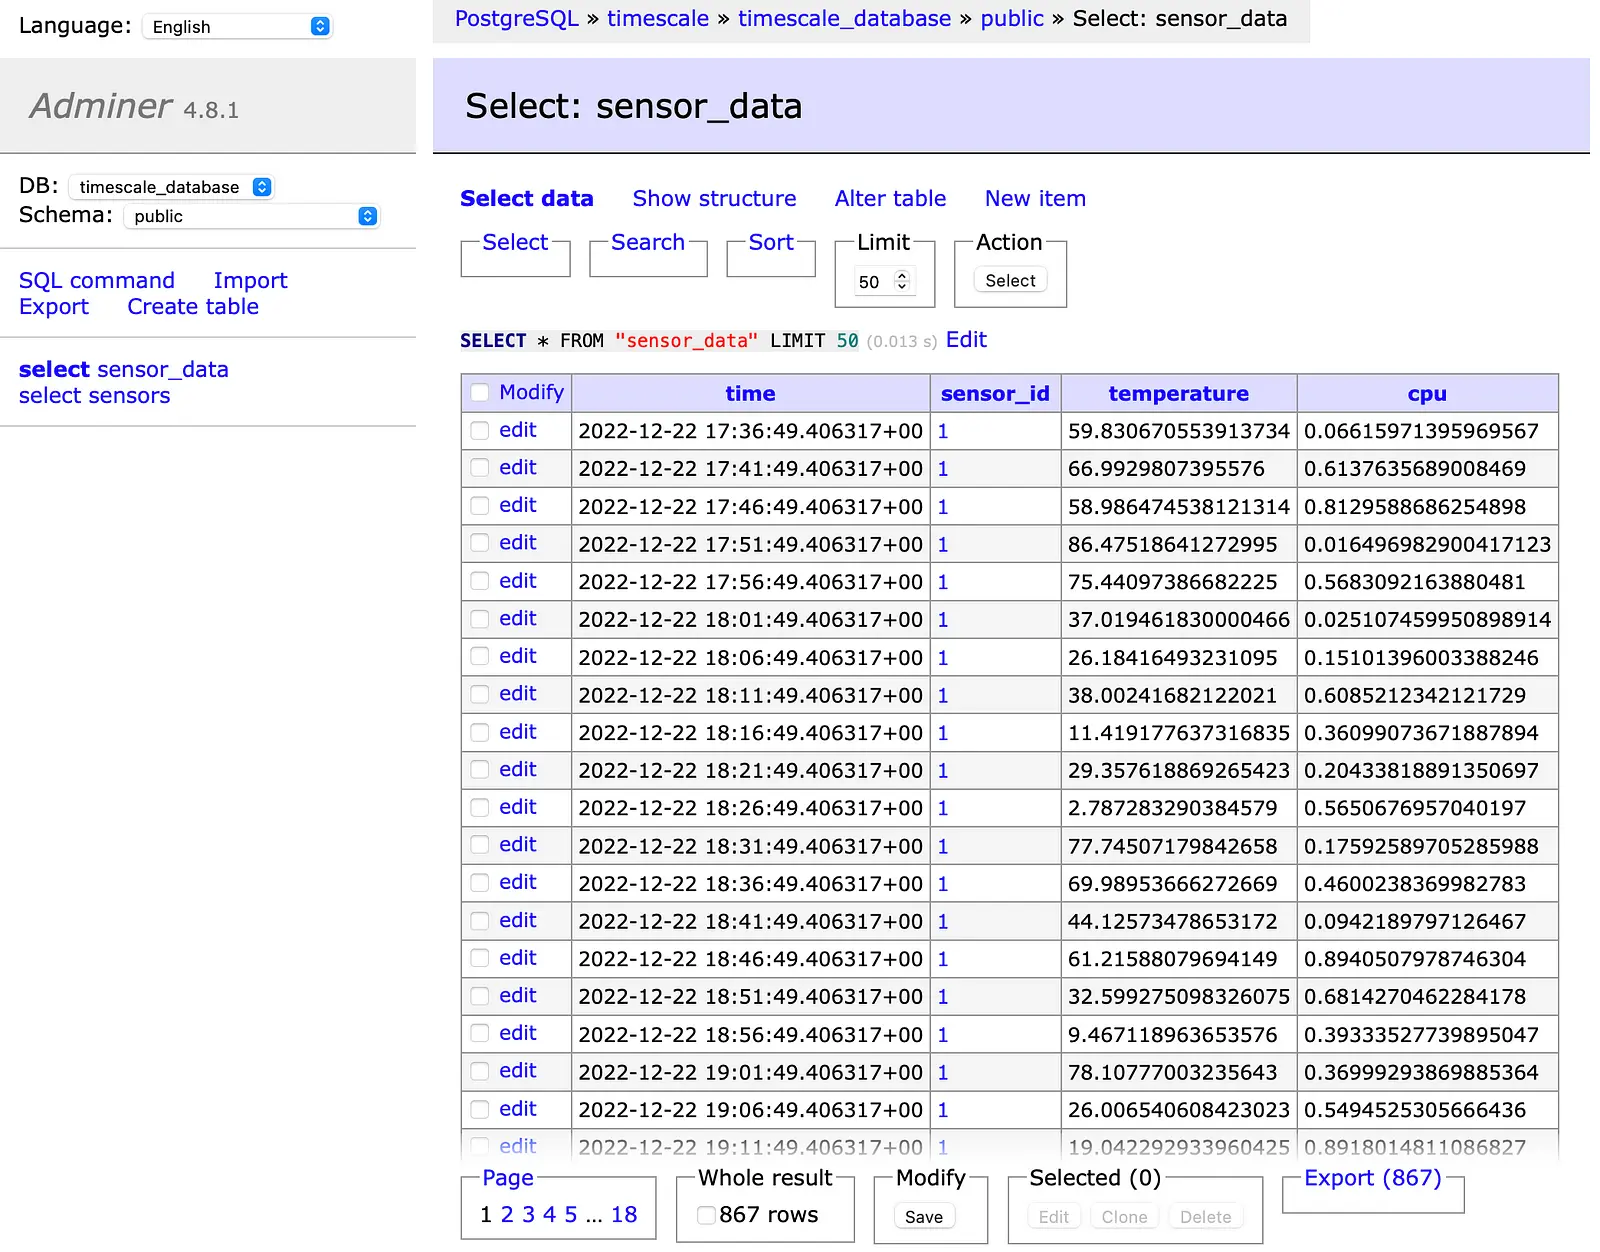
We also create a hypertable named **sensor\_data**. Note that the hypertable contains the obligatory time column. Next, convert the table **sensor\_data** into a hypertable with a SELECT statement. Note that you need to specify the table name of the hypertable and the name of the time column as two arguments. Finally, you have to commit your changes and close the cursor.
```python
# create sensor data hypertable
query_create_sensordata_table = """CREATE TABLE sensor_data (
time TIMESTAMPTZ NOT NULL,
sensor_id INTEGER,
temperature DOUBLE PRECISION,
cpu DOUBLE PRECISION,
FOREIGN KEY (sensor_id) REFERENCES sensors (id)
);"""
query_create_sensordata_hypertable = "SELECT create_hypertable('sensor_data', 'time');"
cursor = conn.cursor()
cursor.execute(query_create_sensordata_table)
cursor.execute(query_create_sensordata_hypertable)
conn.commit() # commit changes to the database to make changes persistent
cursor.close()
```
### Insert data
In the following example, we insert a list of tuples called ***sensors*** into the relational table called **sensors**.
```python
# insert rows into TimescaleDB
SQL = "INSERT INTO sensors (type, location) VALUES (%s, %s);"
sensors = [('a', 'floor'), ('a', 'ceiling'), ('b', 'floor'), ('b', 'ceiling')]
cursor = conn.cursor()
for sensor in sensors:
try:
data = (sensor[0], sensor[1])
cursor.execute(SQL, data)
except (Exception, psycopg2.Error) as error:
print(error.pgerror)
conn.commit()
```
Using psycopg2 would be sufficient to insert rows into the hypertable. However, for faster performance, we use *pgcopy*. To do this, install pgcopy with pip and add it as import instructions.
```bash
# install pgcopy
pip install pgcopy
```
Now, we will insert time series data into the hypertable.
```python
from pgcopy import CopyManager
cursor = conn.cursor()
# for sensors with ids 1-4
for id in range(1, 4, 1):
data = (id,)
# create random data
simulate_query = """SELECT generate_series(now() - interval '24 hour', now(), interval '5 minute') AS time,
%s as sensor_id,
random()*100 AS temperature,
random() AS cpu
"""
cursor.execute(simulate_query, data)
values = cursor.fetchall()
# column names of the table you're inserting into
cols = ['time', 'sensor_id', 'temperature', 'cpu']
# create copy manager with the target table and insert
mgr = CopyManager(conn, 'sensor_data', cols)
mgr.copy(values)
# commit after all sensor data is inserted
# could also commit after each sensor insert is done
conn.commit()
```
Finally, we check in the Adminer if everything works well. In the first screenshot, you can see the **sensors** table with the added data.
The second screenshot shows the **sensor\_data** hypertable with the added time series data.
## Conclusion
In this article, we saw how to set up a Docker Stack with TimescaleDB and Adminer. In this context, we learned how to connect to the time series database and how to insert time series data. TimescaleDB has the advantage that you can create tables for relational data as well as for time series data.
Thanks so much for reading. **Have a great day!**
💡 Do you enjoy our content and want to read super-detailed guides about AI Engineering? If so, be sure to check out our premium offer!