**Do you want to build an AI chatbot that can answer complex financial questions, like plotting a chart for stock price performance? If so, this article might be very interesting for you!**
Generated with Grok
Building a chatbot app for stock market questions can be complex and time-consuming, but Python packages like Chainlit and AG2 make it much easier.
In addition, more and more small open-source models are entering the market, enabling you to run LLM apps entirely on your local machine for free. That opens the door for developers worldwide to create amazing AI apps.
In this step-by-step guide, we'll show you how to build an AI-powered stock market analyst that can compare year-to-date (YTD) stock price gains between different stocks.
Let's build a local chatbot for the stock market!
## Sneak Peak
## Tech Stack
Our chatbot uses Meta's `Llama 3.1:8b` as LLM and has tool use support. So you can easily add new functions or tools to the application.
For this, we use the following frameworks:
* [Chainlit](/software-engineering/build-a-local-chatbot-in-minutes-with-chainlit/) as an intuitive user-interface
* AG2 to implement the AI agents
We've written a [comprehensive article about the AG2 framework](/data-science/build-a-financial-multi-agent-system-with-ag2-and-ollama/). If you are not familiar with AG2, we recommend reading this article first.
## Prerequisites
You will need the following prerequisites:
* Python package manager of your choice (We use [conda](https://docs.conda.io/en/latest/miniconda.html){:target="_blank" rel="noopener"}).
* A code editor of your choice (We use [Visual Studio Code](https://code.visualstudio.com/){:target="_blank" rel="noopener"}).
* Download [Ollama](https://ollama.com){:target="_blank" rel="noopener"} and install [Llama3.1](https://ollama.com/library/llama3.1){:target="_blank" rel="noopener"}. Make sure that it runs on your computer.
* A computer with a GPU (We use a MacBook Pro M4 Max 48 GB).
ℹ️ *We recommend a computer with at least 16GB RAM to run the examples in this guide efficiently.*
## Step-by-Step Guide
### Step 1: Setup the development environment
* **Create a conda environment**: A virtual environment keeps your main system clean.
```bash
conda create -n stock-price-performance python=3.11.9
conda activate stock-price-performance
```
* **Clone the GitHub repo**:
```bash
git clone https://github.com/tinztwins/finllm-apps.git
```
* **Install requirements**: Go to the folder `compare-stock-price-performance` and run the following command:
```bash
pip install -r requirements.txt
```
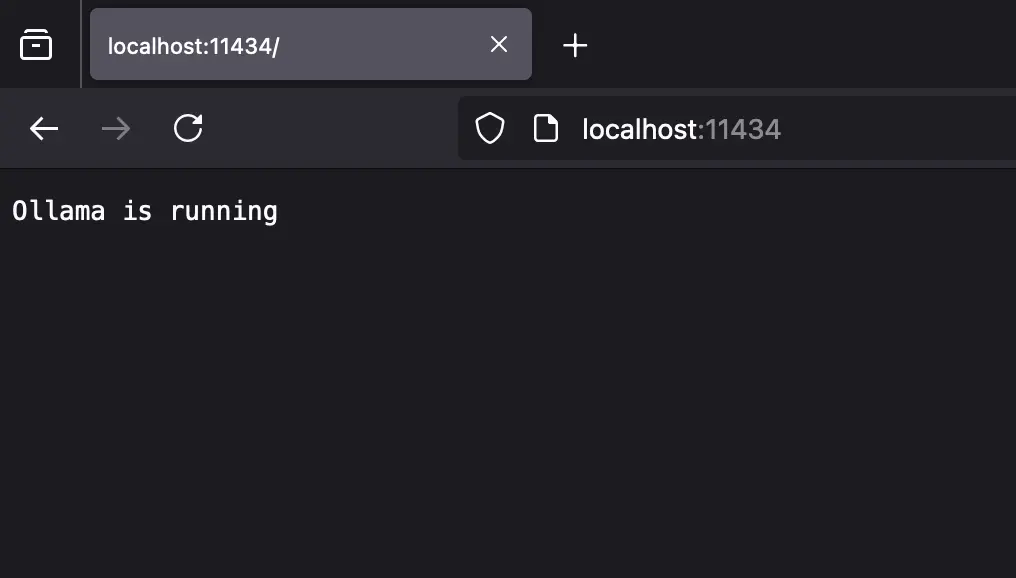
* Make sure that **Ollama** is running on your computer:
### Step 2: Create the Chainlit App
* **Import required libraries**: First, we import all necessary libraries.
```python
import chainlit as cl
from autogen import ConversableAgent, register_function, GroupChat, GroupChatManager
import matplotlib.pyplot as plt
import yfinance
from typing import Annotated
```
* **Start a new chat session**: Every Chainlit app follows a [life cycle](/software-engineering/build-a-local-chatbot-in-minutes-with-chainlit/#chat-life-cycle). The framework creates a new chat session when a user opens the Chainlit app. When a new chat session begins, Chainlit triggers the `on_chat_start()` function. In addition, we can store data in memory during the user session. So, we can persist the agent objects with the command `cl.user_session.set("agent_name", agent_object)`.
```python
# Agent code and Tool registration
# ...
cl.user_session.set("manager", manager)
cl.user_session.set("user_proxy_agent", user_proxy_agent)
```
* **Create Agents**: In AG2, you can create a new agent object with `ConversableAgent(...)`. You can pass this object several parameters, like name, system_message, and llm_config. We use `Llama3.1:8b` as a language model. It supports tool use and provides reasoning capabilities to the agents.
```python
# Configure the API endpoint for your model
config_list = [
{
"model": "llama3.1:latest",
"api_type": "ollama",
}
]
```
```python
# Define the financial analyst agent that suggests tool calls.
financial_analyst = ConversableAgent(
name="Financial Analyst",
system_message="You are a helpful AI assistant."
"You can help with plotting financial charts."
"Don't plot a chart when no stock symbols are given."
"Return 'TERMINATE' when the task is done.",
llm_config={"config_list": config_list},
)
# This is the assistant agent.
assistant_agent = ConversableAgent(
name="Assistant",
system_message="You are a helpful AI assistant."
"You can help with general queries and questions about the stock market."
"Add 'TERMINATE' to every answer.",
code_execution_config=False,
llm_config={"config_list": config_list},
human_input_mode="NEVER",
)
# The user proxy agent can interact with the assistant agent and the financial analyst.
user_proxy_agent = ConversableAgent(
name="User",
llm_config=False,
is_termination_msg=lambda msg: msg.get("content") is not None and "TERMINATE" in msg["content"],
human_input_mode="NEVER",
max_consecutive_auto_reply=3,
)
```
* **Registration of the function**: Next, we register a Python function/tool with the agents so they can use it to answer user questions. In AG2, you can use the `register_function(...)`. The following code shows the function and its registration.
```python
def get_stock_prices(stock_symbols,
start_date,
end_date):
stock_data = yfinance.download(
stock_symbols,
start=start_date,
end=end_date
)
return stock_data.get("Close")
def plot_ytd_gains(stock_symbols: Annotated[list[str], "The stock symbols to get the prices for. (list[str])"],
start_date: Annotated[str, "Format: YYYY-MM-DD"],
end_date: Annotated[str, "Format: YYYY-MM-DD"]) -> str:
stock_data_list = list()
for i in stock_symbols:
stock_price_data = get_stock_prices(i, start_date, end_date)
stock_ytd_gain = (stock_price_data - stock_price_data.iloc[0]) / stock_price_data.iloc[0] * 100
stock_data_list.append(stock_ytd_gain)
fig, ax = plt.subplots(figsize=(10, 6))
for df in stock_data_list:
plt.plot(df, label=df.columns.values[0])
plt.title('Stock Price Performance YTD')
plt.xlabel('Date')
plt.setp(ax.get_xticklabels(), rotation=45, ha='right')
plt.ylabel('Gain in %')
plt.legend()
plt.grid(True)
cl.user_session.set("figure", fig)
return "The task is done."
```
```python
# Register the function to the two agents.
register_function(
plot_ytd_gains,
caller=financial_analyst,
executor=user_proxy_agent,
name="plot_ytd_gains",
description="A function to plot the stock gain YTD for the given stock symbols.", # A description of the tool.
)
```
* **Create a GroupChat**: Next, we need to connect the three agents. That makes it possible for the agents to talk to each other. In this context, we can configure the conversation. The following Python code shows that only the `user_proxy_agent` can talk to the other agents. However, the other agents can only talk to the `user_proxy_agent`. The group chat manager manages the conversation.
```python
# Create a GroupChat
groupchat = GroupChat(agents=[user_proxy_agent,
assistant_agent,
financial_analyst],
messages=[],
max_round=5,
allowed_or_disallowed_speaker_transitions={
user_proxy_agent: [assistant_agent,
financial_analyst],
assistant_agent: [user_proxy_agent],
financial_analyst: [user_proxy_agent],
},
speaker_transitions_type="allowed",)
manager = GroupChatManager(groupchat=groupchat, llm_config={"config_list": config_list})
```
* **New message from the user**: The `on_message(message: cl.Message)` function is called when a user sends a new message. In this context, the `user_proxy_agent` initiates a new group chat. Then, the `manager` decides which agent can answer the user's question best. The `manager` forwards general questions about the stock market to the `assistant_agent` and questions about creating a chart to the `financial_analyst`. If a plot is created, it will be displayed. If not, a text response will be provided.
```python
@cl.on_message
async def on_message(message: cl.Message):
manager = cl.user_session.get("manager")
user_proxy_agent = cl.user_session.get("user_proxy_agent")
groupchat_result = await cl.make_async(user_proxy_agent.initiate_chat)(manager, message=message.content)
fig = cl.user_session.get("figure")
if fig:
elements = [
cl.Pyplot(name="plot", figure=fig, display="inline"),
]
await cl.Message(
content="You can see the stock gain YTD plot below:",
elements=elements,
).send()
cl.user_session.set("figure", 0)
else:
msg = cl.Message(content="")
for chunk in groupchat_result.summary:
await msg.stream_token(chunk)
await msg.send()
```
ℹ️ If you want to learn more about Chainlit, check out our [introduction article on Chainlit](/software-engineering/build-a-local-chatbot-in-minutes-with-chainlit/).
### Step 3: Run the App
* **Start the Chainlit App**: Go to the project folder and run the chatbot app with the following command:
```bash
chainlit run app.py
```
* **Chatbot App**: Open `http://localhost:8000` in your web browser and enter a question about the stock market.
## Conclusion
Great! You have built a local AI chatbot to plot a financial chart. The combination of Chainlit and AG2 provides a strong foundation for building more advanced AI applications.
You can use the code provided as a starting point for your next project. Feel free to share your project on social media and mention us so we can see what you're working on.
Happy coding!
💡 Do you enjoy our content and want to read super-detailed guides about AI Engineering? If so, be sure to check out our premium offer!