Build a Local AI Agent with Memory Using Agno and gpt-oss
AI Agents are becoming more powerful and can independently solve complex tasks. A key part of developing advanced AI Agents is memory. This allows an Agent to remember past interactions and engage in context-aware, human-like conversations.
Memory is generally understood as the ability of an Agent to store insights and facts about the user. It’s about creating a profile of the user to personalize the Agent’s responses.
In this step-by-step guide, we show you how to create a local AI Agent with memory. For this, we use the Python framework Agno and OpenAI’s new open-source LLM gpt-oss.
Agno Agents natively support Agentic Memory Management. With Agentic Memory, the Agent can create, update, and delete memories from user conversations by itself.
Let’s get started!
Sneak Peak
Tech Stack
For our demo AI Agent, we use OpenAI’s gpt-oss:20b as LLM. gpt-oss:20b is an open-weight model designed for powerful reasoning, agentic tasks, and versatile developer use cases.
To create the app, we use the following technologies:
- Agno to implement the AI Agent
- Agno’s Playground as an intuitive interface for testing and interacting with AI Agents
Prerequisites
You will need the following prerequisites:
- Python package manager of your choice (We use conda).
- A code editor of your choice (We use Visual Studio Code).
- Download Ollama and install
gpt-oss. Make sure that it runs on your computer. You can download the model usingollama run gpt-oss. - A computer with a GPU (We use a MacBook Pro M4 Max 48 GB).
We recommend a computer with at least 16GB RAM to run the examples in this guide efficiently.

Step-by-Step Guide
Step 1: Set up the development environment
- Create a conda environment: A virtual environment keeps your main system clean.
conda create -n agent-memory-tools python=3.12.7
conda activate agent-memory-tools
- Clone the GitHub repo:
git clone https://github.com/tinztwins/finllm-apps.git
- Install requirements: Go to the folder
agent-memory-toolsand run the following command:
pip install -r requirements.txt
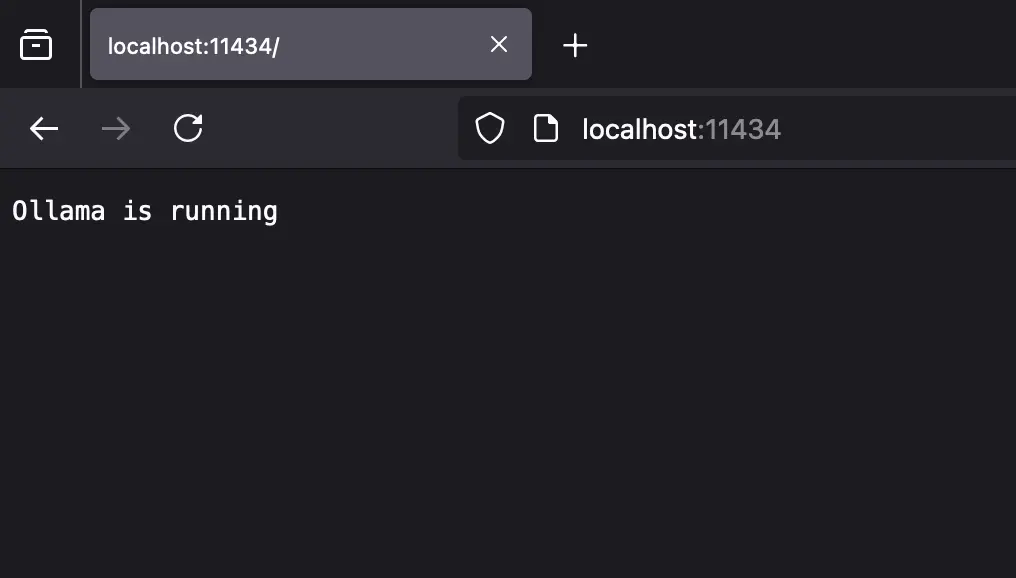
- Make sure that Ollama is running on your computer:
Step 2: Create the AI Agent with Agno
- Import required libraries: First, we need to import all necessary libraries.
from agno.agent import Agent
from agno.memory.v2.db.sqlite import SqliteMemoryDb
from agno.memory.v2.memory import Memory
from agno.models.ollama import Ollama
from agno.tools.yfinance import YFinanceTools
from agno.playground import Playground
- Initialize memory: The
Memoryclass in Agno lets you manage all aspects of user memory. We use SQLite as the database for the memories. In addition, we usegpt-oss:latestas the large language model via Ollama. With thedelete_memoriesparameter, we enable the ability to delete memories.
memory = Memory(
    model=Ollama(id="gpt-oss:latest"),
    db=SqliteMemoryDb(table_name="user_memories", db_file="tmp/agent.db"),
    delete_memories=True,
    clear_memories=True,
)
- Create an Agent: In Agno, you can create an Agent with
Agent(). You can pass this object several parameters, e.g.,model,tools,description,instructions,memory, andenable_agentic_memory. First, we assign the LLM to the Agent via Ollama.
# Agent Code

agent = Agent(
    model=Ollama(id="gpt-oss:latest"),
    tools=[
        YFinanceTools(stock_price=True,
                      company_info=True,
                      stock_fundamentals=True,
                      analyst_recommendations=True,
                      historical_prices=True),
    ],
    description="You are an investment analyst that researches stock prices, company infos, stock fundamentals, analyst recommendations and historical prices",
    instructions=["Format your response using markdown and use tables to display data where possible."],
    user_id="tinztwins",
    memory=memory,
    enable_agentic_memory=True,
    markdown=True
)
-
Add tools to the Agent: To give the Agent access to financial information, we use
YFinanceTools. This allows the Agent access to stock price data, company info, fundamental data, analyst recommendations, and historical price information. -
Description and instructions: Through the
instructionsparameter, you can provide the Agent with a list of instructions. Thedescriptionis added at the beginning of the system message. You can control the Agent’s behavior through these parameters. -
Add memory to the Agent: We assign the
memoryvariable defined above to thememoryparameter. There, we store the user memories with theuser_id=tinztwins. The parameterenable_agentic_memorygives the Agent the ability to update memories.markdown=Trueensures that the output format is Markdown. -
Serve the Agent via a Playground Server: To use Agno’s Playground, we need to provide the Agent as a playground server. The Python code looks as follows:
playground = Playground(agents=[agent])
app = playground.get_app()

if __name__ == "__main__":
    playground.serve("playground:app", reload=True)
Step 3: Set up Agno’s Playground
The playground offers a robust interface for testing your agent-based systems with extensive features. First, you need to create an Agno account at app.agno.com and copy your API Key (top right corner).
Next, you need to export the API key in your workspace. To do this, enter the following command in your terminal:
export AGNO_API_KEY=ag-***
Step 4: Run the demo app
Navigate to the project folder and run the following commands.
Start the Playground Server:
python playground.py
The playground server is running at http://localhost:7777.
Test the Agent in the Playground UI:
Open your browser and go to app.agno.com. The playground opens, and you can test your Agent.
Conclusion
Congratulations! You have successfully created a local AI Agent with memory using Agno and OpenAI’s powerful “gpt-oss” model. In this step-by-step guide, you learned how to give an Agent memory, allowing it to provide personalized responses.
By adding YFinanceTools, the Agent has access to financial data. That shows how simple it is to add more features to the Agent. With Agno’s intuitive framework and the local capabilities of gpt-oss, you are no longer dependent on external APIs for development. This keeps your data private.
We hope this tutorial was insightful and helps you to develop the next generation of AI applications.
Happy coding!