**A lot has happened since the initial release of ChatGPT. In the meantime, the open-source industry has developed many powerful large language models (LLMs).**
Generated with Microsoft Copilot
You can use these models for free locally on your computer. It is now possible to create your own local chatbot for different use cases.
In this tutorial, we'll show you how to create a beautiful-looking chatbot with Chainlit. Chainlit is an open-source Python package to build production-ready chatbots. In addition, we'll use LangChain and Ollama to interact with local LLMs.
> Chainlit is a comprehensive framework for creating custom Conversational AI applications. It has never been easier to develop production-ready chatbots. - Tinz Twins
**We'll discuss the following points:**
* What is Chainlit?
* The main concepts of Chainlit
* Create a local Chatbot with Chainlit
* Further resources
* Conclusion
## Sneak Peak
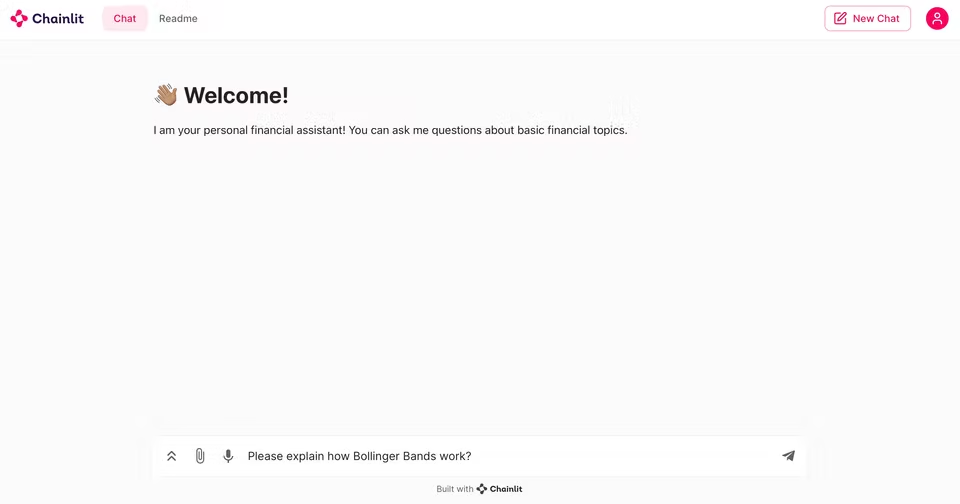
In this tutorial, we will build a local chatbot that can answer questions on basic financial topics. Here's a Sneak Peak:
## What is Chainlit?
Chainlit is an open-source framework that simplifies the creation of chatbot apps with a ChatGPT-like User Interface. Chainlit provides many benefits for developers. You can build apps very fast because you can integrate them seamlessly with an existing code base or create a new app from scratch in minutes. Furthermore, you can write the chatbot logic once and use it everywhere. You can use a Chainlit app across multiple platforms.
Chainlit is the perfect starting point for anyone who wants to create production-ready chatbots. Furthermore, Chainlit offers many possibilities for customization. If this is not enough, you can also use Chainlit with your own custom frontend. In addition, Chainlit can be used very flexibly and is constantly being improved with new functions.
## Chat Life Cycle
In this tutorial, we will focus on the main concepts of Chainlit. The framework offers many features, but for beginners, only a few are necessary. For this reason, we will introduce you to the most important features.
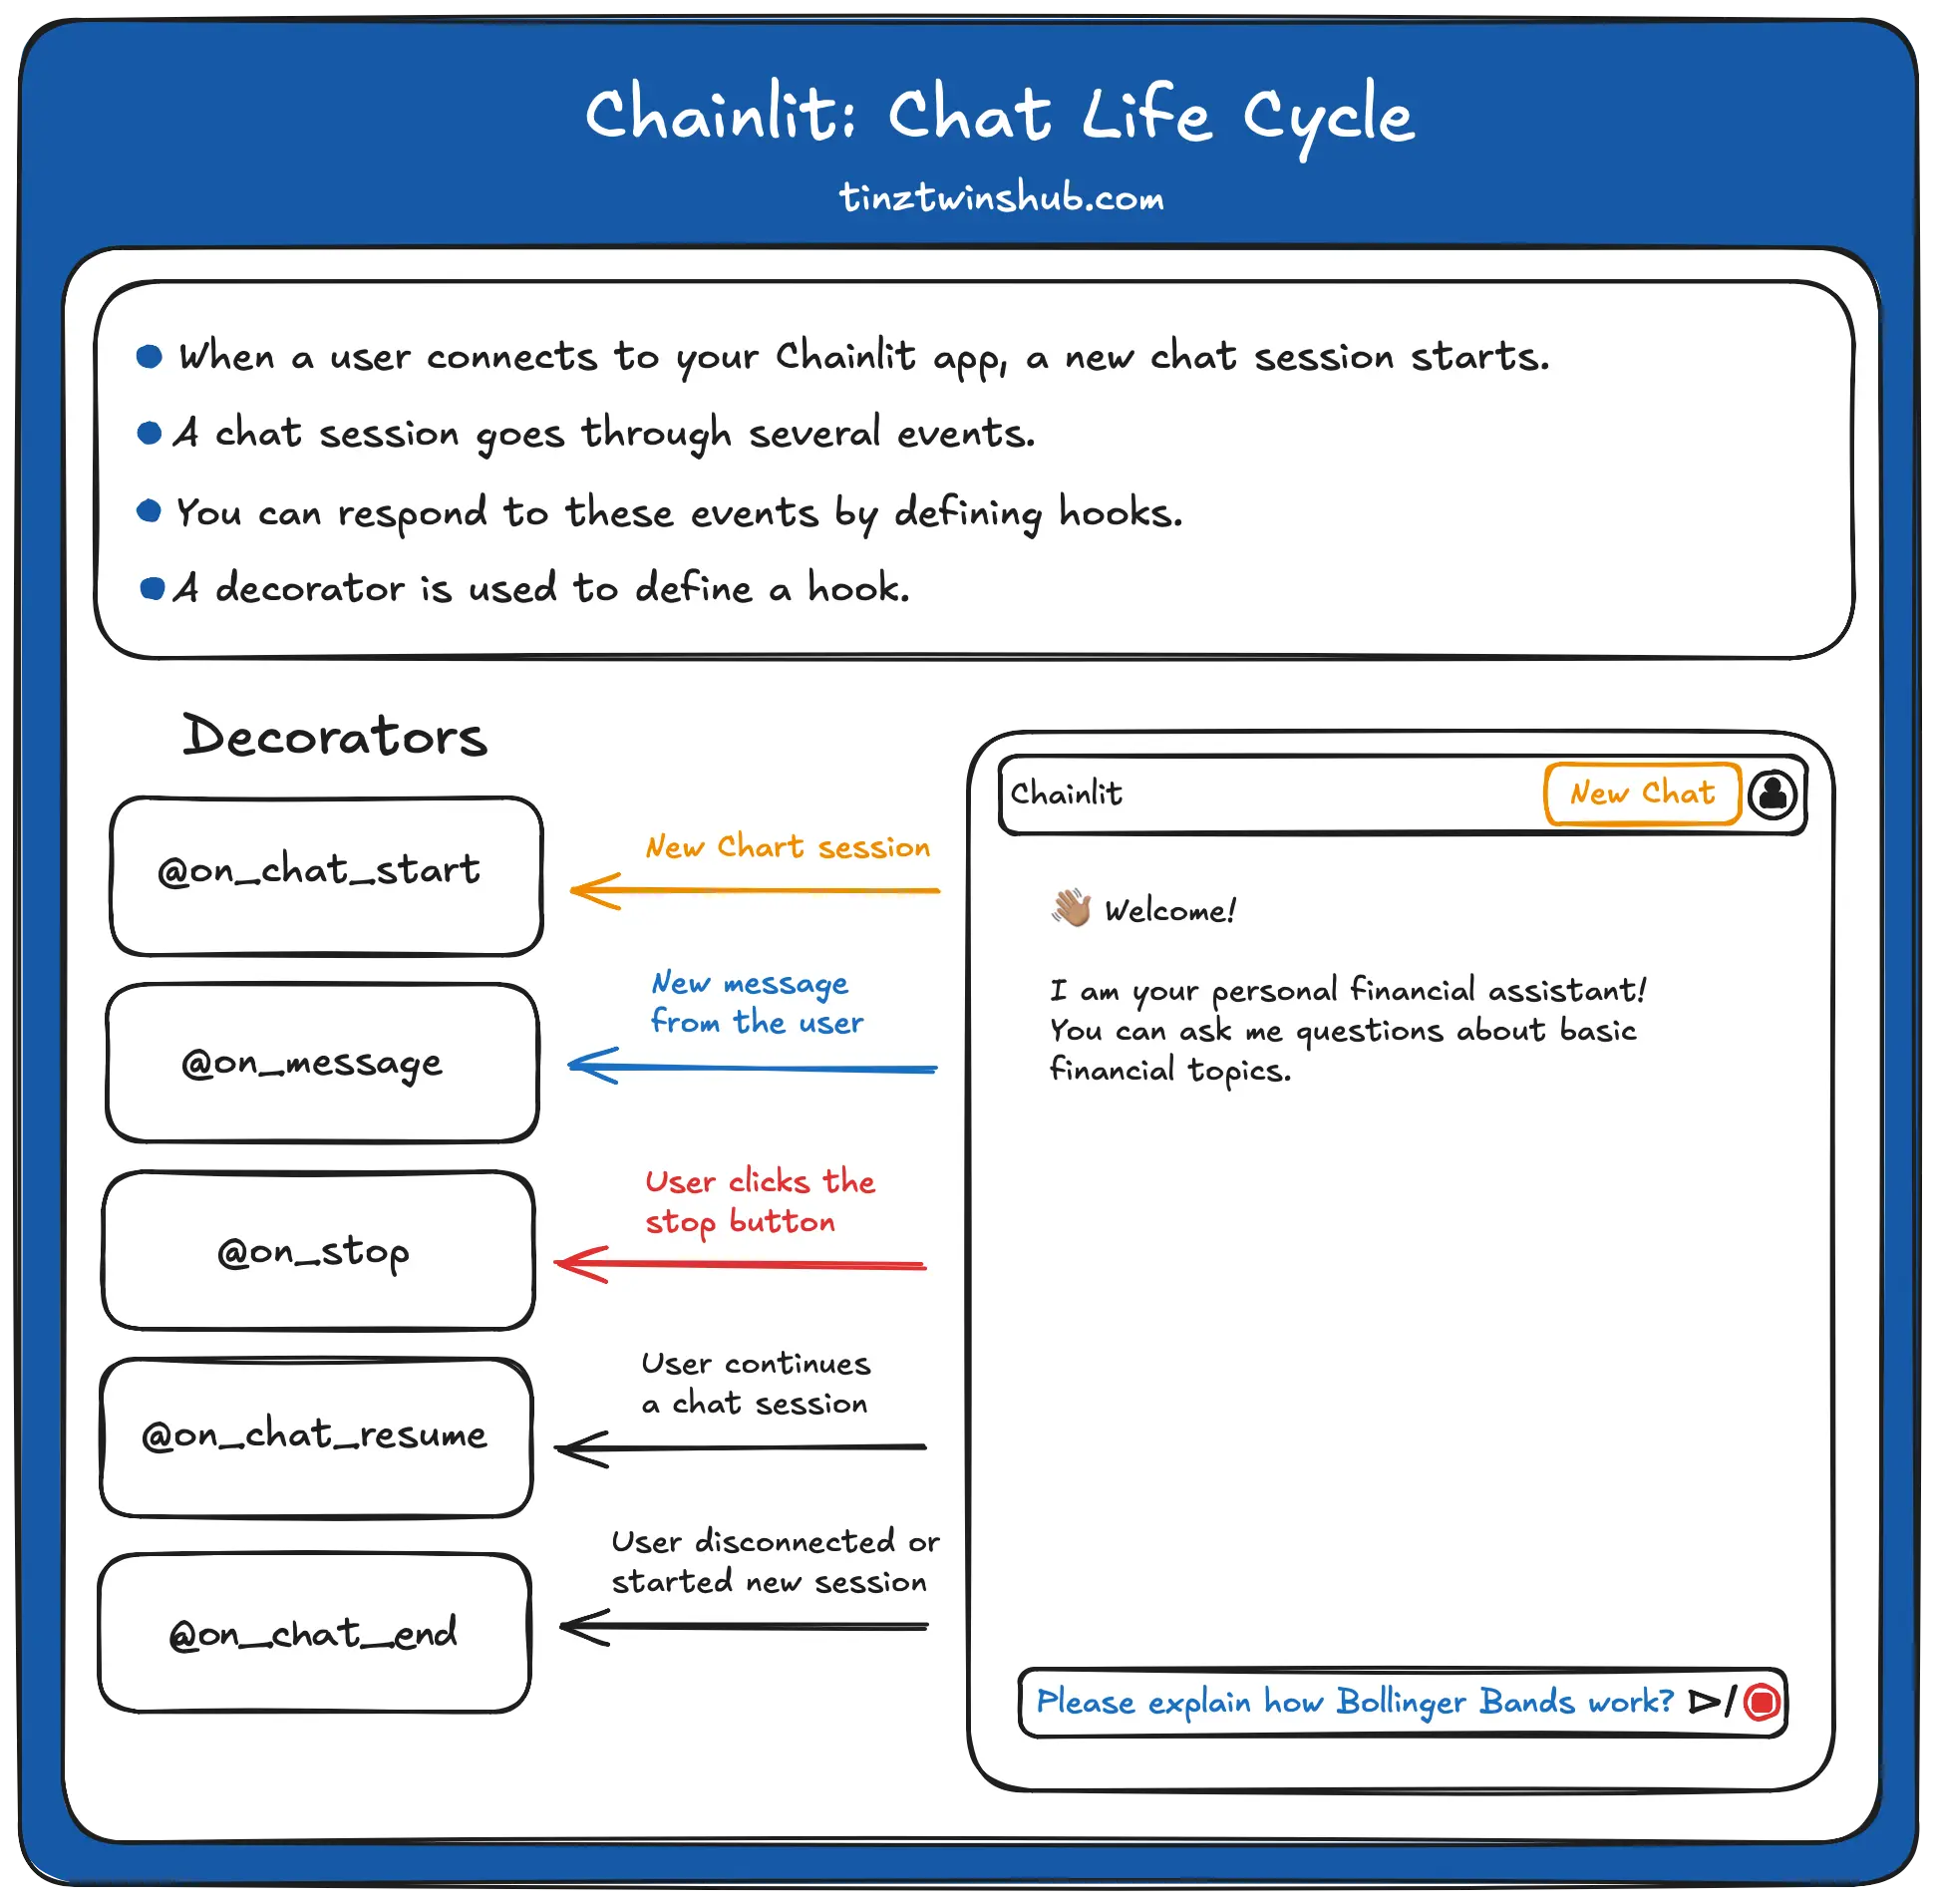
Every Chainlit app follows a life cycle. When a user opens your Chainlit app, a new chat session is created. A chat session goes through a life cycle of events. You can respond to events by using decorators (marked with @). A decorator defines a hook that is called when a specific event occurs. The following figure illustrates the procedure.
**On Chat Start**
The `on_chat_start()` function is triggered when a new chat session begins.
```python
@cl.on_chat_start
def on_chat_start():
print("A new chat session has started!")
```
**On Message**
The `on_message(msg: cl.Message)` function is called when a new message from the user is received. A message is information sent from the user to a chainlit app and vice versa. In conjunction with life cycle hooks, they are the building blocks of a chat.
A message object has content, and a timestamp and cannot be nested.
```python
import chainlit as cl
@cl.on_message
def on_message(msg: cl.Message):
print("The user sent: ", msg.content)
```
**On Stop**
The `on_stop()` function is called when the user clicks the stop button in the Chainlit UI (marked red in the illustration above).
```python
@cl.on_stop
def on_stop():
print("The user wants to stop the task!")
```
**On Chat End**
The `on_chat_end()` function is called when the chat session ends. For example, if the user disconnected or started a new chat session.
```python
@cl.on_chat_end
def on_chat_end():
print("The user disconnected!")
```
## Create a local Chatbot with Chainlit
We explain the creation of the chatbot in several steps so that you can easily follow the process. You should have a basic understanding of Python.
### Step 1 - Environment Setup
There are some technical requirements before we can build our Chatbot app. You should make sure that you've installed Python, conda, and pip. In addition, you need access to a terminal or a code editor of your choice (we use VSCode).
First, we create a virtual Python environment via conda. You can create a virtual Python environment with the following terminal command:
```bash
conda create --name chatbot-app python=3.10.14
```
To activate the environment, enter the following command:
```bash
conda activate chatbot-app
```
Nice! If everything is ok, you have a working virtual environment. Next, we need to install all required dependencies. You can do this with `pip install`. For our example, we use the Chainlit version `1.0.506` and the langchain version `0.2.1`. Enter the following command in your terminal.
```bash
pip install chainlit langchain
```
Great, all required requirements are installed. Next, you must download [Ollama](https://ollama.com){:target="_blank" rel="noopener"}. With Ollama, you can run open-source LLMs locally on your computer. This also means that the data is only processed locally on your computer. **No API calls are necessary!**
That's it! The setup process is finished!
### Step 2 - Create an app.py file
Next, you create a new Python file named `app.py` in your project directory. In this file, we implement the main logic of the chatbot app.
### Step 3 - Create the basic code structure
In the `app.py` file, we import the Chainlit package and define the essential functions. The `on_chat_start()` function will be called when the chatbot app starts. The `on_message(...)` will be called every time a user asks a question in the chatbot UI. In the next step, we will add custom logic within these functions. The `cl.Message` class is used to send a message back to the user.
```python
import chainlit as cl
@cl.on_chat_start
async def on_chat_start():
# ...
@cl.on_message
async def on_message(message: cl.Message):
# ...
msg = cl.Message(content="")
# ...
await msg.send()
```
### Step 4 - Implement logic of on\_chat\_start()
The function `on_chat_start()` will executed when a new chat session starts. Inside the function, we create an instance of the Ollama with the model "[phi3](https://news.microsoft.com/source/features/ai/the-phi-3-small-language-models-with-big-potential/){:target="_blank" rel="noopener"}". "phi3" is a small open-source language model from Microsoft that is cost-effective. However, you can also use more powerful models such as Llama3.
In addition, we define a prompt using the `ChatPromptTemplate.from_messages()` method. The prompt consists of a system and a human message. With the system message, we set the role of the chatbot as a financial expert. The human message is a placeholder and will be replaced with the question of the chatbot user.
```python
import chainlit as cl
from langchain_community.llms import Ollama
from langchain.prompts import ChatPromptTemplate
from langchain.schema import StrOutputParser
from langchain.schema.runnable import Runnable
from langchain.schema.runnable.config import RunnableConfig
@cl.on_chat_start
async def on_chat_start():
model = Ollama(model="phi3")
prompt = ChatPromptTemplate.from_messages(
[
(
"system",
"You are a financial expert with an extensive expert knowledge.",
),
("human", "{question}"),
]
)
runnable = prompt | model | StrOutputParser()
cl.user_session.set("runnable", runnable)
```
Next, we create a `runnable` object by piping the `prompt`, the `model`, and a `StrOutputParser()`. The function of the `runnable` is simple. When the user sends a question to the chatbot, then the `runnable` is called with this question. First, it will format the question into the prompt. After that, it passes the prompt to the model to generate a response. In the last step, it pastes the response into a string.
In the last line of code, we store the `runnable` in the user session. That allows us to access and use the `runnable` in other parts of the chatbot code. You will see it in the next step.
### Step 5 - Implement logic of on\_message(...)
Now, we define a function `on_message()`, which is triggered whenever a new message is received. The function gets the message from the user as an argument. Next, we can get the `runnable` object from the user session. After that, we create a new `cl.Message` object with an empty string as its content. We use this object to send the chatbot's response back to the user.
```python
import chainlit as cl
from langchain_community.llms import Ollama
from langchain.prompts import ChatPromptTemplate
from langchain.schema import StrOutputParser
from langchain.schema.runnable import Runnable
from langchain.schema.runnable.config import RunnableConfig
# ...
@cl.on_message
async def on_message(message: cl.Message):
runnable = cl.user_session.get("runnable") # type: Runnable
msg = cl.Message(content="")
async for chunk in runnable.astream(
{"question": message.content},
config=RunnableConfig(callbacks=[cl.LangchainCallbackHandler()]),
):
await msg.stream_token(chunk)
await msg.send()
```
The next part of the code is where the magic happens. The `astream()` method of the runnable object is called with the user's message and a configuration object as arguments. The method generates a stream of responses from the LLM. Furthermore, the configuration object specifies a callback function to handle the stream responses. We use the `LangchainCallbackHandler()` function. The `astream()` method returns an asynchronous iterator that yields chunks of the LLM response. Next, we call the `stream_token()` method of the `msg` object for each chunk of the response. That adds the chunk to the content of the `msg` object. Finally, we send the response to the user with the `send()` method of the `msg` object.
Here's the entire code in a single code block:
```python
import chainlit as cl
from langchain_community.llms import Ollama
from langchain.prompts import ChatPromptTemplate
from langchain.schema import StrOutputParser
from langchain.schema.runnable import Runnable
from langchain.schema.runnable.config import RunnableConfig
from chainlit.types import ThreadDict
from chainlit.cli import run_chainlit
@cl.on_chat_start
async def on_chat_start():
model = Ollama(model="phi3")
prompt = ChatPromptTemplate.from_messages(
[
(
"system",
"You are a financial expert with an extensive expert knowledge.",
),
("human", "{question}"),
]
)
runnable = prompt | model | StrOutputParser()
cl.user_session.set("runnable", runnable)
@cl.on_message
async def on_message(message: cl.Message):
runnable = cl.user_session.get("runnable") # type: Runnable
msg = cl.Message(content="")
async for chunk in runnable.astream(
{"question": message.content},
config=RunnableConfig(callbacks=[cl.LangchainCallbackHandler()]),
):
await msg.stream_token(chunk)
await msg.send()
@cl.on_stop
def on_stop():
print("The user wants to stop the task!")
@cl.on_chat_end
def on_chat_end():
print("The user disconnected!")
@cl.on_chat_resume
async def on_chat_resume(thread: ThreadDict):
print("The user resumed a previous chat session!")
if __name__ == "__main__":
run_chainlit(__file__)
```
Great! That's the coding part. Let's run the application.
### Step 6 - Run the chatbot app
You can start the app with the following terminal command:
```bash
python app.py
```
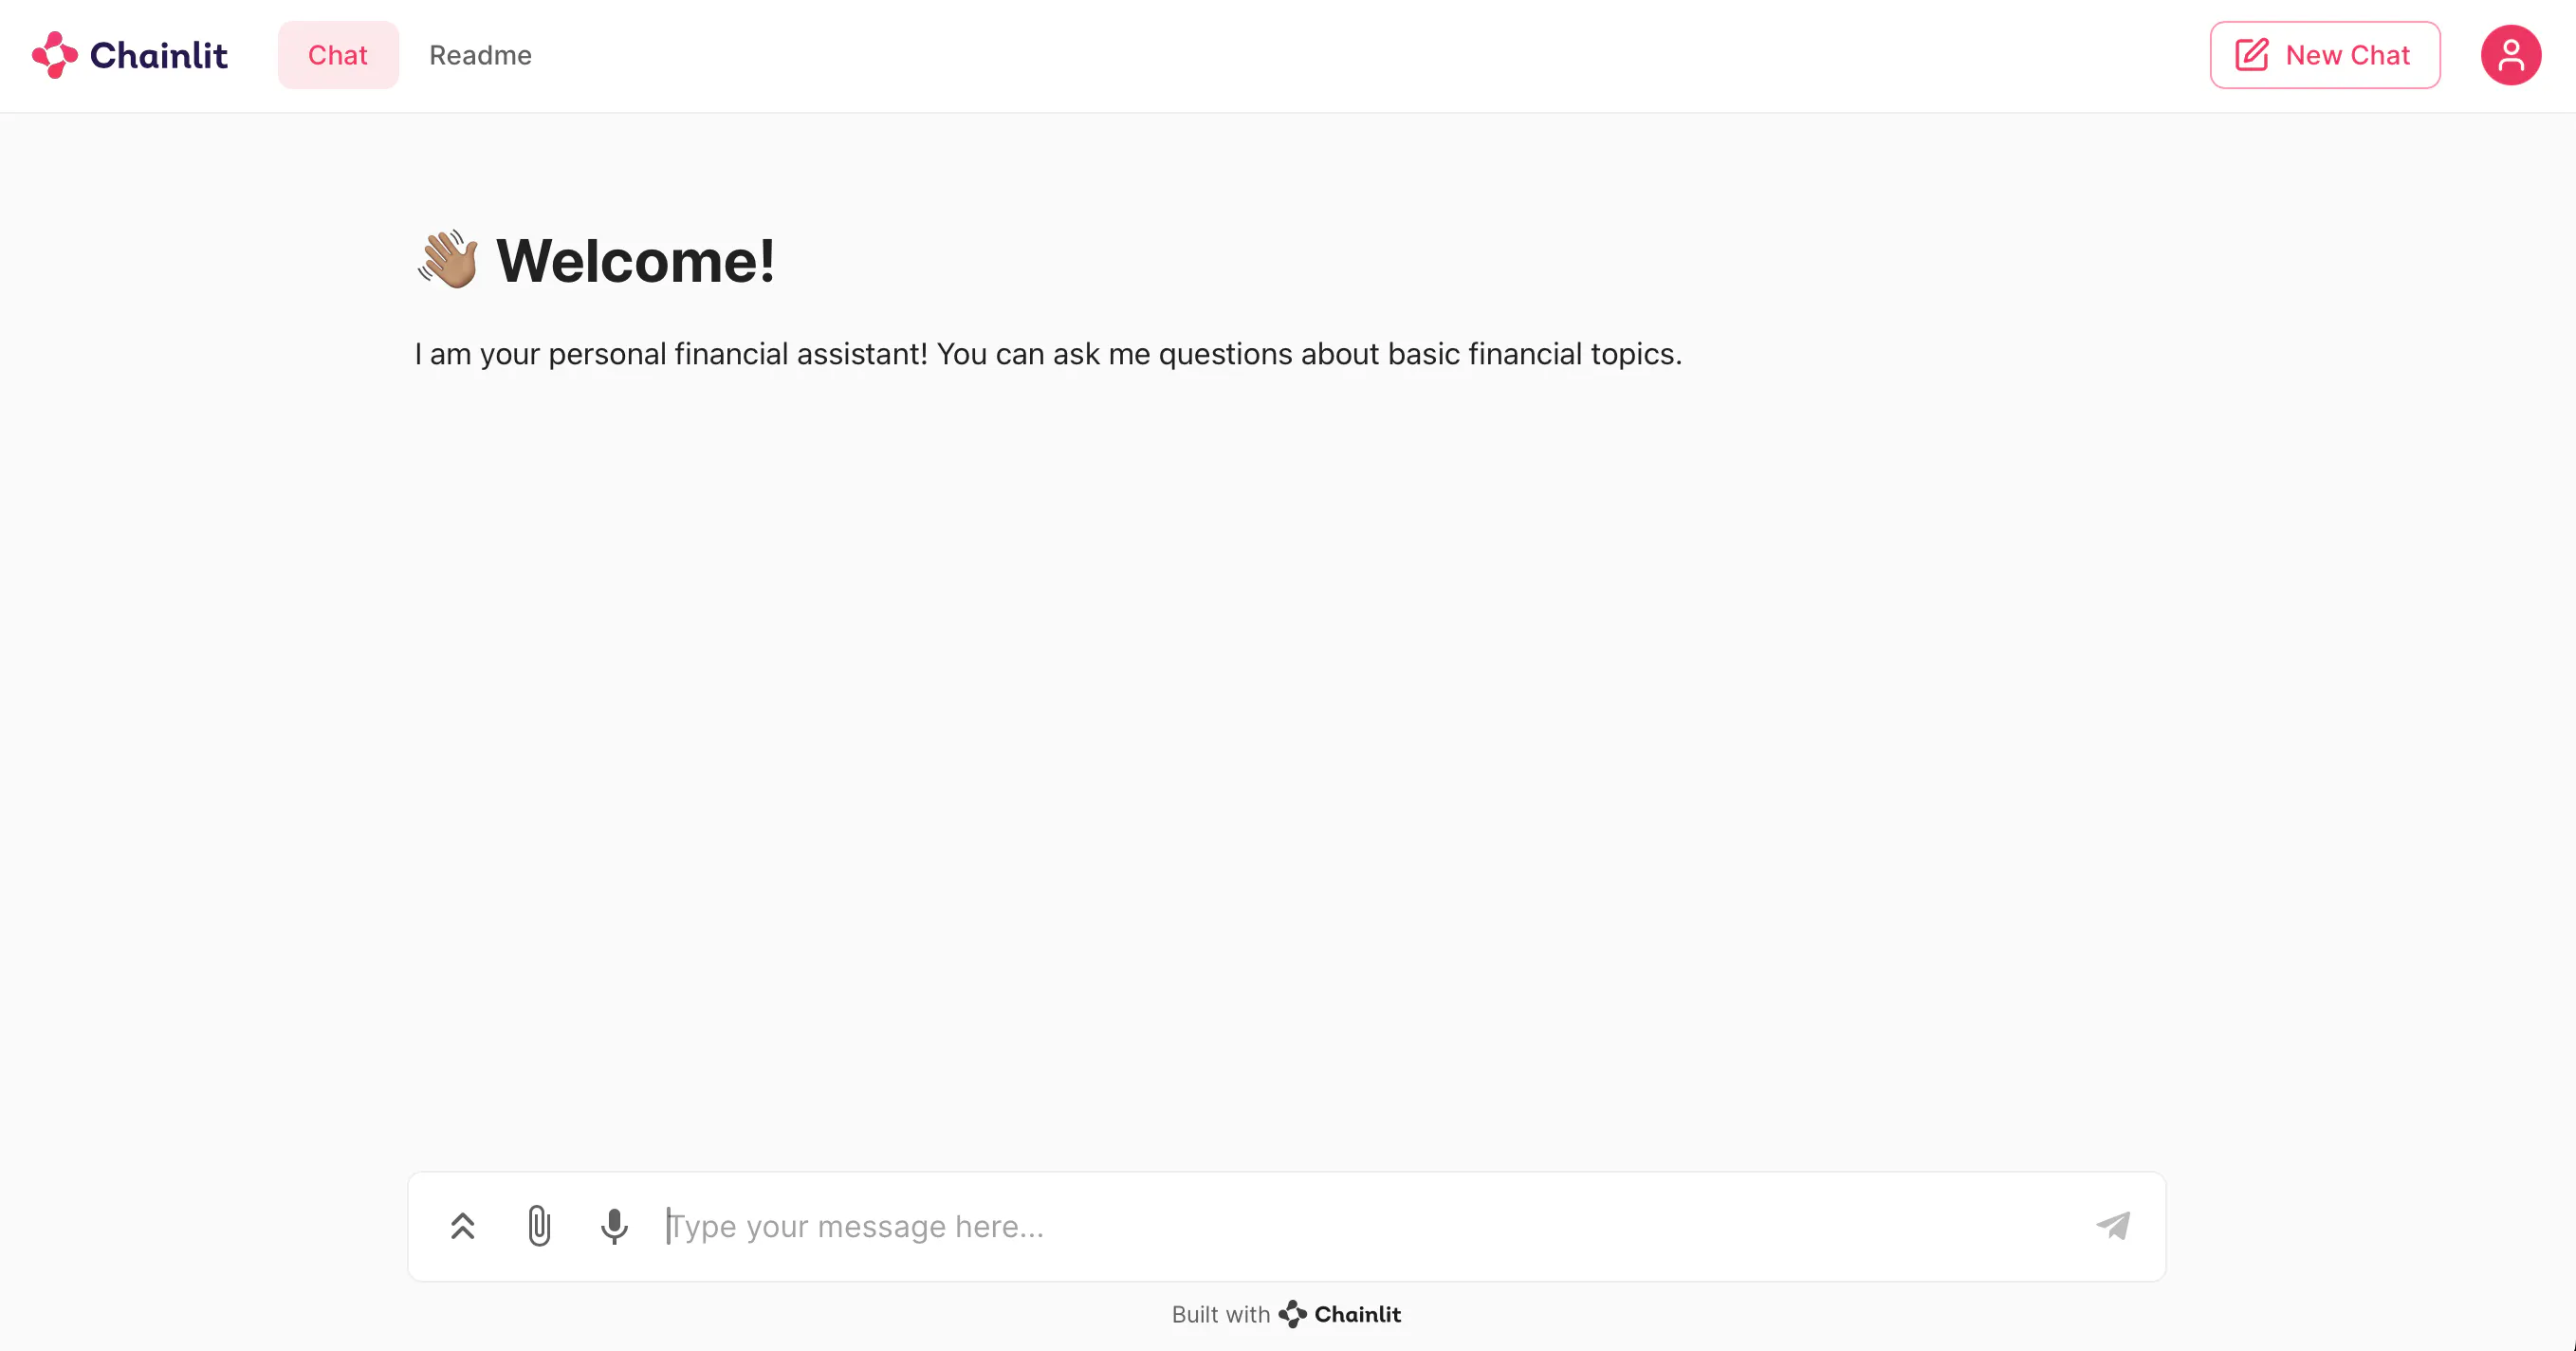
The following chatbot user interface will then appear under [http://localhost:8000](http://localhost:8000)
Congratulations! 🎉
You have created your first local Chainlit chatbot.
## Further resources
There are so many more exciting features from Chainlit. The [Chainlit documentation](https://docs.chainlit.io/get-started/overview){:target="_blank" rel="noopener"} is a good place to learn more about the basic and advanced functions. In addition, there are many good Chainlit resources on the internet that can help you with chatbot development. For example, the [Chainlit Cookbook](https://github.com/Chainlit/cookbook){:target="_blank" rel="noopener"}. The Cookbook is regularly updated and contains many useful code examples.
## Conclusion
In this article, you've learned how to create a local Chatbot using Chainlit, LangChain, and Ollama. This powerful combination allows you to build efficient, production-ready chatbots quickly and easily. In addition, we have introduced you to the Chat Life Cycle. Furthermore, we explained the chatbot creation process in several steps. You have learned how to send messages to a local LLM and return the answer in a stream to the UI. Now, you can create ChatGPT-like applications in just a few minutes.
Happy coding! 😀😀
💡 Do you enjoy our content and want to read super-detailed guides about AI Engineering? If so, be sure to check out our premium offer!